Table Saw Arbor Bearing Replacement
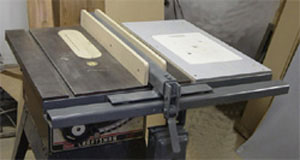
 I noticed that my aging Craftsman table saw was not running as quietly as it used to and that the blade seemed to rub the side of the zero clearance insert when it was starting up and shutting down. After unplugging the saw I found that I could wiggle the blade indicating that the bearings were shot. Knowing that I had a job to do in the next couple days I decided to pull it apart and see what was going on with it. I must apologize, I was in a hurry and did not stop to take pictures so you will have to make do with my sketches and verbal directions. Removing the Arbor Assembly: This entire operation was performed through the opening in the back of the saw. First step was to remove the blade. I removed the motor by loosening the two 1/2" bolts on the adjustment slide and pulling the entire unit out, fortunately the wire to the motor was long enough that I could lay it on the table. I then removed the tilting adjustment hand wheel, there is an allen screw that holds it on. When the wheel was removed I had access to the two small bolts that held a flange on the inside of the base that held a bearing for the tilt adjustment screw. Working through the back of the saw I rotated the adjusting screw rod in until the end if it cleared the hole in the base. I removed the height adjustment wheel by removing the screw that goes into the end of the shaft, removed the locking bolt and the indicator pointer. To take out the arbor assembly I removed the three bolts in the rear trunion, pulled the unit back out of the front trunion and I had it loose in my hands. Replacing the Bearings: I removed the pulley, then had access to three screws securing a flange to hold the outside bearing in the casting.
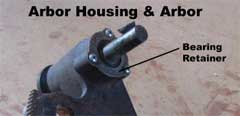
Using a hammer and a brass drift I tapped the arbor shaft out of the casting, what I had now is in the photo below:
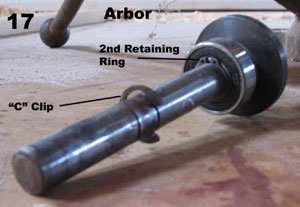
I removed the snap ring and the "C" clip, then removed the inside bearing with the gear pullers. Note: When I bought the bearings I was in a hurry and grabbed two off the rack at the suppliers, when I got home and went to install them I found that they slipped on to the shaft with a very loose fit. Upon returning to the supplier I was informed that I had grabbed metric sized ones, not the 5/8" ones I needed, (the numbers are very similar, but different, never pays to be in a hurry, 1602-10-2RS are what I needed. After removing the old outside bearing, cleaning up and lubing the assembly the new 5/8" bearings were installed by driving the inside one on with a length of pipe that fit around the shaft and against the bearing race, then assembly was just the reverse of taking it apart. To set the blade parallel to the miter slot I clamped a hardwood strip to the miter gauge with a 1/8" shim between it and the front of the blade, removed the shim and slid the miter gauge back and set the gap at the back edge of the blade with the shim back in place by moving the rear trunion. I then removed the shim, set the hardwood strip so it just touched the teeth as I rotated the blade by hand, carefully slid the miter gauge back to the front and checked the feel of it there. After a couple more minor tweaks of the rear trunion I was happy. The saw runs like a dream again, the fix cost me less than $5.00 and not counting the two trips to the supplier less than two hours of my time. |
Tools Required:
Screwdriver
|

