
Pattern Making
|
Enlarging Patterns Software There is a free software program, both PC and Mac versions, available called PosteRazor that will tile a large image into smaller sections that can be printed on an 8.5 X 11 format printer. The images can then be pieced together for a full sized pattern. http://posterazor.sourceforge.net/ Using a Grid To enlarge a picture make a photocopy or scan the original, then draw a grid on the copy. Draw a grid with larger squares on the material or on a large sheet of paper or cardboard if more than one pattern will be needed. Number the corresponding squares on the photocopy and the enlarged grid. Copy the image square by square to the enlarged grid. I find it easier to draw any straight lines first, then connect them with the curved lines.
Grid Template Paint a sheet of pegboard white, with different colored markers circle the holes to indicate the various sizes.  Lay this on top of material and mark through the holes to indicate the corners of the grid squares. Online Graph Paper Generate your own graph paper, then download it for free as a pdf. Photcopy Method To enlarge an image that is larger than the paper, copy the image to the largest size that will fit on the paper, draw a grid on this copy, fold copy in two lengthwise making one part larger than the other, fold the other way making one part larger. Copy this to required size, repeat for the other three quadrants, match grid lines and tape the four copies together. 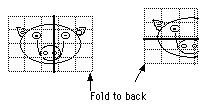
Scanner Method If you have a scanner you can use a method similar to the photocopy method, scan the document to your computer, using a drawing program add a grid, select areas that will fit on a 8 1/2 X 11 sheet when printed to the enlarged percentage, paste them into a new document and print them, join all of the sheets together matching the grid lines. Symetrical Shapes  It is only necessary to draw one half of the pattern, the second half can be rendered in three ways: Method 1 Draw design on folded paper with fold on center line, cut out and unfold. Method 2 Cut out one half of design, trace around it, flip and trace second half. Method 3 Draw first half, trace over design with tracing paper, using a pencil with a soft lead shade outline, turn paper over and align with first half. With a pencil with a hard lead trace around design, the soft lead will act as carbon paper and transfer the design.
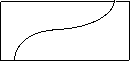
Ogees
One cut creates two
equal pieces. Proportions To enlarge or reduce an object draw a diagonal line from corner to corner, if enlarging extend line outside top corner. Extend or shorten base to desired dimension, a line extended from this point to diagonal line indicates the height.
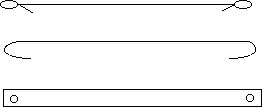
Drawing Large Curves Method 1 Use a length of string, a bent wire , or a strip of wood with holes drilled in each end the length of the radius. Hook one end around a nail driven in at the center of the curve and hook a pencil in the other end. If you don't want to make a nail hole, drill a hole in the center of a can lid for a roofing nail, draw lines to divide it into quarters to make it easier to position it. Push the roofing nail up through the hole and fasten the can lid to the material with masking tape.
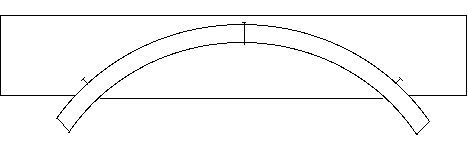
Method 2 Mark the center of the top and the two lower points of the curve.
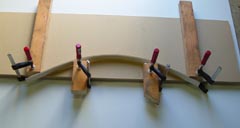
Drive nails in at the marks, lay a thin batten around the nails and draw the curve. The curve may be adjusted if you use blocks and clamps instead of the three nails.
Sources for Patterns Other than the obvious, the library and the internet, there are other sources for unique patterns. Childrens colouring books have a lot of good designs for animals and people, seasonal objects can be adapted from cookie cutter shapes. Computer clip art is an endless resource and can be sized easily in a simple graphics program. Laying Out An Elipse |


|
|