Caution: unplug machine before starting this project.
|
|
When
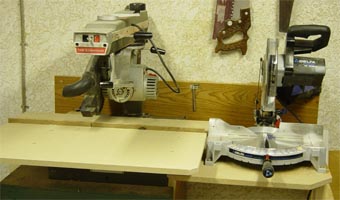
I decided to add a shelf beside the radial arm saw for the miter saw I
figured it was probably a good time to replace the table on it as well.
This saw is not a stock set up, sometime before I acquired it the
brackets for the table had been replaced with DEXION shelving angle
iron. This set up looked in pretty good shape so I decided to continue
using it. |
| I
cut three pieces for the top from a 2' X 4' sheet of 3/4" MDF. Since
the old top was 32" long I decided to make the new one the same as space
is limited.
The
main section is 17 1/2" wide, the fillers are 1 1/2" and 5 1/2" wide,
the panel was actually 24 1/2" wide, otherwise the main section would
have been only 17". There was not enough material to make the 1 1/2"
strip for the fence so I used some plywood that I had.
|
|
|
|
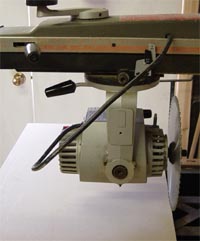
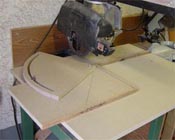
To
locate the main table I removed the blade guard and swung the motor to
the in-rip position with the pointer at 0 on the in-rip scale and locked
the motor in position. I raised the blade so the table would just pass
under it and aligned the edge of the table with the inside of the blade.
I placed a straight edge against the inside of the blade and lined up
the table so it was parallel to the blade. I then marked the position to
drill the holes for the front two mounting bolts. I selected a position
in the center of the slot nearest the end of the brackets. I then
removed the table, drilled a 1/8" hole at each mark, then from the top I
drilled 5/8" holes 3/8 of an inch deep for the bolt heads, then drilled
1/4" holes for the bolts. I then mounted the table to the brackets with
1/4" X 1 1/4" carriage bolts. |
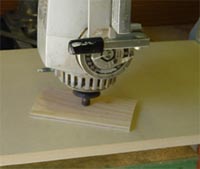
| To
double check if the table was level, I removed the blade and turned the
motor on end so the shaft was pointing down toward the table, with the
motor fully extended to the outside and the arm at 90 degrees I lowered
the shaft down on to a plywood block until it just fit snuggly between
the end of the shaft and the table, then checked it at the inside edge
of the table. I then rotated the arm to 45 degrees and checked the
inside and outside of the table edges, then the opposite side. I was
lucky the top was actually level despite the makeshift brackets. |
|
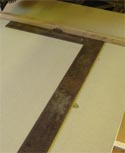
| I
then replaced the blade and the guard, inserted my new fence and the
two filler strips, plugged the saw in and selected a decent looking
scrap 1 X 6 and made a test cut. I set the height of the blade just
above the table so it would not cut all the way through the material. I
checked the cut with a square that I know is accurate, tweaked the
position of the table by tightening the clamp on the side that had to be
moved back and checked again and continued in this manner until the cut
was perfectly square.
I
then measured from the outer edge of the table to a spot toward the
inside edge of the table from underneath to position a hole that would
be drilled through the metal in the support between the slots. With a
square on the top I marked the positions of the two holes, drilled a
3/8" deep 5/8" holes, then 1/4" holes through both the top and the
support bracket. This was so the top would not slide out of true when
the clamps were tightened to hold the fillers and the fence in the
future.
Rather than swinging the arm to make miter cuts I prefer to use a jig, there are plans for two of them here.
|
|
|
|
|